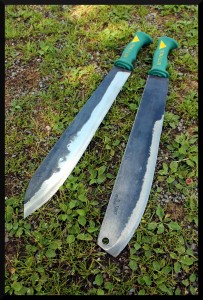
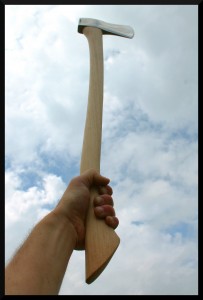
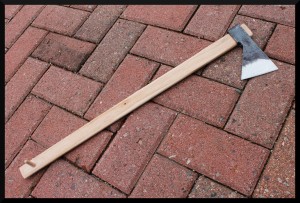
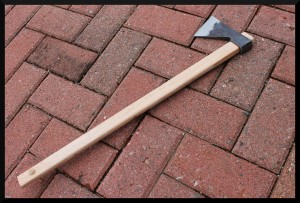
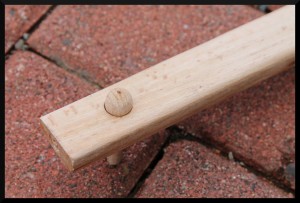
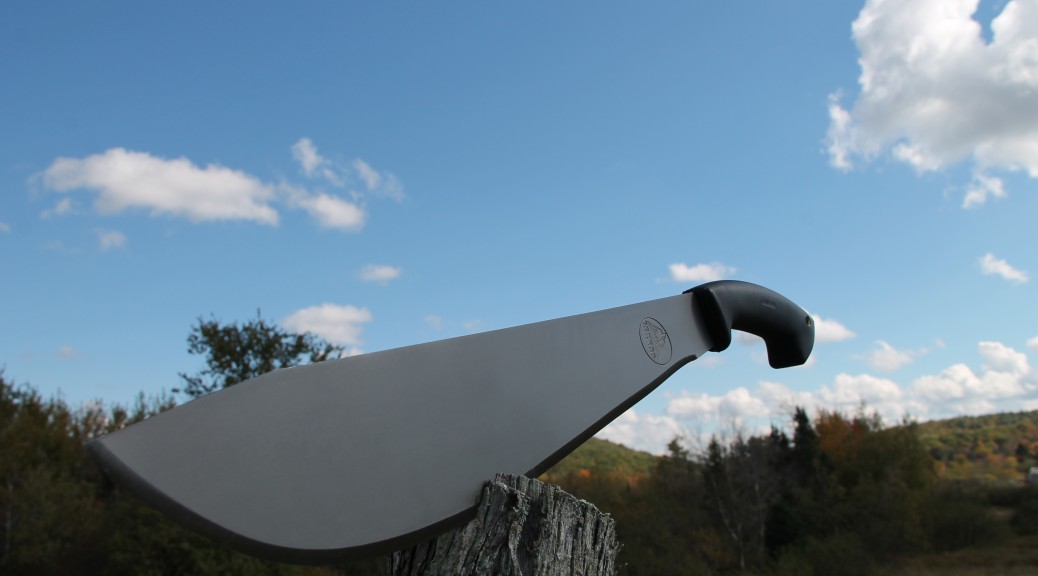
An excellent Italian machete from Rinaldi given a drop point and full regrind. The blade is distal tapered and fully forged construction, with a good hard, yet springy, heat treatment. The tapered stick tang is extremely stout, yet allows for a very dynamic balance that makes this heavy chopper lively in the hand.
Category Archives: Guides
Customized Condor Michigan Axe
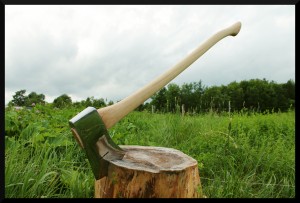
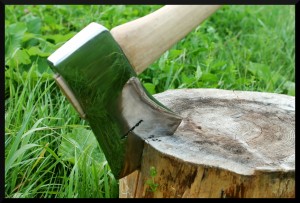
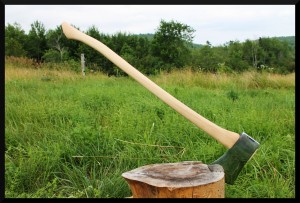
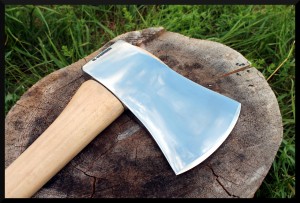
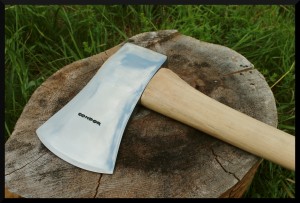
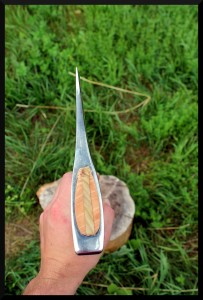
A Condor Michigan axe head ground and polished to a hazy mirror finish, and a high centerline ground in. The handle is an O.P. Link shaved down to shape.
Solving the Tomahawk Handle Knob Problem
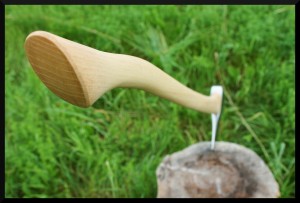
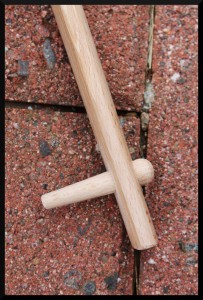
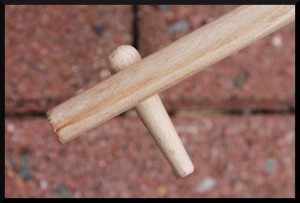
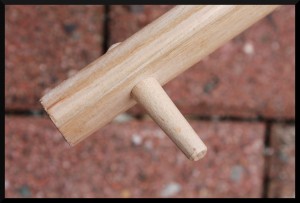
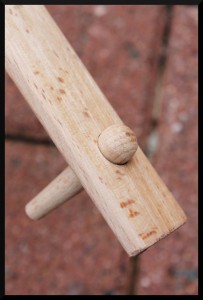
Shown here is a 350g Rinaldi “Calabria” hand axe with a modified handle. A common complaint raised regarding slip fit handles is that (despite their virtues) a knob is either small or totally absent, meaning there is little or nothing to stop the hand from slipping off the end of the handle if a loose grip is used. A simple tapered cross-pin at the end of the handle creates a removable solution to this problem.
A tapered hole was bored with a small step drill and a wooden pin, tapered to match, driven into the hole. The single-sided pin with the projection to the outside of the hand is the most comfortable and secure arrangement vs. a finger-sided or double-sided projection, and if the head must be removed from the handle for use as an independent tool the wooden pin is easily driven out so it does not obstruct the removal of the head. This provides several notable advantages over the use of a lanyard: the user’s hands may slide freely along the handle as needed to adjust grip position, the handle may still be immediately released in the event of an emergency or accident, and the pin allows the end of the handle to be tucked under a belt and have it stay there nicely if the user’s hands need to be free without setting the axe on the ground.
Finding The Balance
Establishing the actual balance point of asymmetric tools like scythes or axes can be fairly difficult, since the real point of balance often lies external to the body of the tool itself. The following shows a method using a plumb line, two suspension points, and photo overlays to approximate the location of the center of gravity.
Why bother with this, you ask? It depends on the tool. With scythes it can assist in adjusting the horizontal balance or determining the “power” of the unit relative to its overall weight, with axes it can help in determining an ideal head and handle pairing (of particular importance in axes with a minimal or totally absent poll, like the one shown here) and with both tools it can aid in establishing the proper hang of the blade/bit. The axis of rotational balance for an axe will lie along a line passing through both the grip point and the center of gravity.
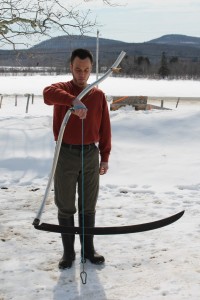
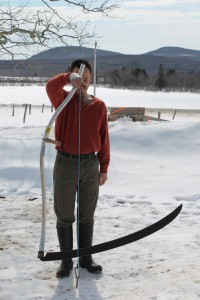
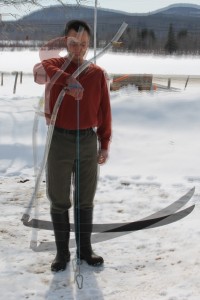
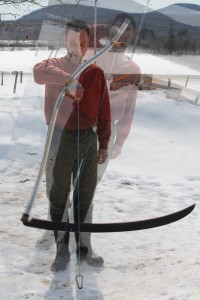
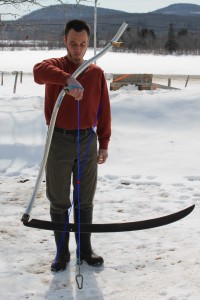
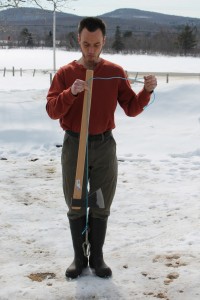
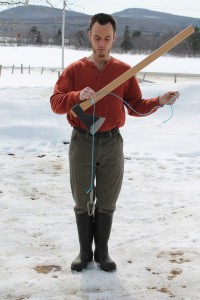

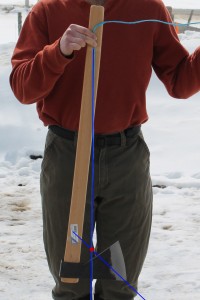
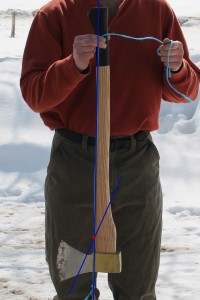
About the tools: The scythe is a vintage Beardsley grain cradle blade on a Seymour Midwest Tools No.8 aluminum snath while the axe is a Rinaldi “Calabria” Heavy Duty Axe. Check them both out at www.BaryonyxKnife.com!
Adjusting the Tang Angle of American Pattern Scythe Blades
American pattern scythe blades traditionally come from the factory with the tang flat, and they are adjusted to the proper angle for the user and their snath by heating and bending for optimal mowing performance. This image series shows our method of going about it, using a Seymour Midwest Tools 30″ grass blade. If you do not have the tools necessary to perform the bending yourself, a local blacksmith, machine shop, or auto mechanic will likely be able and willing to perform the job.
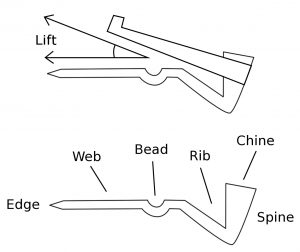
The angle you will need will depend on your height, stance when mowing, the tuning of your snath, how much bend or “lift” there is in the neck of your snath (typically about 25° in most American snaths) and your intended mowing environment. In general a good rule of thumb is that the edge should ride about the thickness of your fingertip above the ground when in mowing stance. A lawn blade may need a slightly lower lay, and if mowing in very heavy or thick vegetation or on bumpy terrain a slightly higher lay may be preferred. See where your blade rides with the tang unbent and determine how much you want to lower it. This will be the amount of bend you’ll be introducing to the tang.

Clamp the blade securely in a sturdy vise. Care should be taken so that when the tang is torqued the strain is carried by the rib rather than the thin web of the blade (the span between the rib and the edge.) Here aluminum vise pads are being used both to appropriately manage the sites of pressure, but also to avoid marring the blade.

Heating the shank of the tang to prepare it for bending requires caution to avoid also heating the edge at the heel of the blade. We use an induction heater, which rapidly heats a narrow band of steel within the confines of its electromagnetic coil, but this is an option few will have. A torch (either MAP gas or oxy acetylene) is much more common, but greater care must be taken with them to mitigate heat migration away from the site of application. A raw potato can be stuck on the edge to shield it from the torch flame as it’s applied to the shank of the tang, or the base of the blade wrapped with a soaking wet rag to act as a heat sink. Try to keep the heat as confined to to the shank as possible, as this is where you want the bending to occur. Bring the metal to at least moderate red heat before attempting to bend.

Now that the tang has been brought to sufficient heat, twisting force needs to be applied to the tang to impart the desired angle of lift–what is known as the “cray” or the “tack” of the tang. A bending fork is the ideal way to do this (it makes it much easier to control the bend) but you can slip a pipe of appropriate dimensions over the tang to do the job as well.

The bending fork or pipe should be close at hand during the heating process so you can get it in position without losing too much of your heat. Apply your pressure in a smooth and controlled manner so you can gauge if excessive stress is being placed on the blade itself. If resistance becomes too great, reapply heat as necessary. It is ideal, however, to get the tang angle set in a single heat.

After bending, allow the tang to air cool–DO NOT QUENCH. Cooling the blade with water or by other rapid means would harden the steel, rendering it brittle. You want the metal to cool slowly so that it will be soft and tough to better resist strain during mowing, and prone to bend rather than snap if abused. Water may be pooled on the heel of the cutting portion of the blade after bending to act as a heat sink to protect against heat migration through the steel, ensuring the temper is not drawn out of the edge, but be careful not to allow it to boil up onto the tang portion where it could cause accidental quenching and hardening.
Do I Really Need a Wet Grinder? | Scythe Q&A Ep1
Is a wet grinder the only way to maintain an American pattern scythe blade? No, but it is the best way! However, if you’re not ready to spring for one just yet this video shows you how to get by.
https://www.youtube.com/watch?v=XjLK6AiprXA&feature=youtu.be
Why glancing blows occur while chopping
How to use a scythe stone
For a selection of the scythe stones we carry, check out our website HERE. 🙂
Efficiency In Tool Selection: A Method
Over my years of edged tool use, experimentation, and study, I’ve tried all sorts of items of widely different quality, price, and features. I’m often asked to weigh in on matching a user to a particular tool, and while I’ve often referenced my methodology of tool selection in the process of this match-making process I haven’t written it down formally until now. While this is a “living process” that will continue to see further tweaking and refinement over time, I think it will serve as a handy reference for others, and it’s about time I put it all down in words.
Note that while this method is written with edged tools as the specific focus, the method may be extended equally to most other forms of gear.
Step 1: Defining Your Purpose
The very first stage in selecting the right tool for your purposes is to very clearly identify and define those purposes. What do you want the tool to do? Note that this can even be so superficial a reason as needing to “scratch the buying itch” to a very wide range of diverse and specific tasks. For instance, do you plan on using the knife or tool for slicing? For carving wood? Food preparation? Batoning? Chopping? Do you need all of the functions in one tool, or can they be spread out amongst two or more? If “scratching the itch” what functional gaps do you have in your present arsenal? It may help to write these tasks down as you think about the situations you might face either on purpose or by happenstance when using the tool.
Once those tasks have been identified, it’s time to put them in prioritized order. Think how frequently you’ll be performing each of those tasks, and number them in order of importance. Since different tasks may have conflicting requirements, this will help you determine how much weight to give each task when attempting to balance between them to establish an optimum compromise.
Lastly, consider the environments you’ll be using the tool in. How are you getting the tool there? How are you storing it? Is it for use around the home, or are you carrying it on extended backpacking trip with a lot of other gear? This will help you narrow in on the ideal balance between function and ease of portability/storage.
Step 2: Translating Functions Into Features
The next step is to take each of those tasks and to translate it into features that provide the benefits you’re looking for. Don’t worry yet if some of those characteristics are in direct opposition to one another–take each task individually. For instance, if you plan on skinning large game, a lot of belly to the edge is usually desirable for making long sweeping cuts. If cutting root vegetables like carrots or potatoes a very thin blade is desirable for gliding through the resistant and easily fractured material. For drilling, a centered point that isn’t too delicate is of benefit. If prying, lateral stiffness and toughness are both required. If chopping or batoning, shock resistance must be given consideration. For detailed or precision work a shorter blade and/or a very fine point are often useful. Write down as many specifications as you can think of for each task or purpose.
Do the same for your environmental concerns. Is bigger or smaller better? Heavier or lighter? Is a sheath or edge cover required? If so, what should it be made of and why? What kind of retention method? Carry method?
Step 3: Balancing Your Antipodes
This is where things really start to take shape. Go through your list of features and find any criteria that oppose each other and rewrite them in antipodes (an-TIP-oh-dees) or paired opposites, with the prioritized one of the two listed first. These pairs are your “neither too this, nor too that” groupings and you must consider how to appropriately balance between the two aspects. Each of these antipodes gets 10 “points” you can divide between the two opposing qualities. Assign these points to the pairs in a way that best represents your needs out of the tool and you’ll know the approximate amount of emphasis that each aspect will receive. For instance, you may be looking for a chopping tool for ultralight backpacking, which will result in at least two antipodes: light/heavy and long/short. You may decide that light overall weight is more important than the advantage in use given by greater weight, and choose a 7:3 balance in that respect, choosing to gain back some chopping power by increasing length a little at the expense of the tool being less easy to pack, selecting a 6:4 balance for that pair.
Step 4: Interpret Your Results
Once you’re finished balancing your antipodes, look over your results and try to think of what a tool that meets all of your criteria would look like. If it helps, try reading the criteria aloud as if describing it to someone else. For instance, based on the limited criteria provided as an example in Step 3 above, we might be looking at something like a long handled lightweight tomahawk. If other criteria were added, like the ability to clear vegetation and brush, the description might more resemble a tip-weighted machete. Once you’ve formed a mental image of the sort of tool you’re looking for (or drawn a sketch if you prefer) we’re ready for the next step.
Step 5: Price vs. Performance
Now that you know what you’re looking for as your ideal, consider what you’re willing or able to spend. Are you able to spring for a top-of-the-line custom that exactly meets your criteria, or do you need/want to look at standard commercial production models? With as many, many knives and tools as there are on the market today, chances are you can find a tool “off the shelf” that fits your purposes nicely. By carefully considering and referencing your list of prioritized criteria you may establish how best to maximize your performance per dollar spent. As with all expenses, there is a point of diminishing returns where each unit of increased performance begins to cost more and more, giving you less and less benefit. In a performance-optimized purchase every area of your criteria will be brought, in weighted proportion, as close to the point of diminishing returns as possible before any excess funds are spent on non-critical features.
Imagine, if you will, that much like in Step 3 you are assigning points to criteria of the tool. However, this time around you have to buy those points with dollars. In a given area of performance, the points per dollar will actually increase as you buy them–such as the first dollar buying you 1 point in that category, the next dollar spent in that category earning you 3 points, etc. until the points per dollar equalizes and then begins to diminish. That tipping point is your point of diminishing returns. Naturally your overall performance will therefore be very low if you sink all of your points into a single category and neglect others. However, if buying a non-custom tool, all of these points are already assigned for you and the total cost of those points is reflected in the purchase price. If buying a custom tool, by contrast, each point costs more because you are paying a premium for the privilege of being able to assign the points yourself with greater specificity. Research your options with diligence–the more choices you uncover the easier a time you will have in deciding on the best tool to purchase.
Step 6: Post-Purchase Reflection
The final step of the process. In spite of the fact that you have now purchased a tool, it must be acknowledged that this choice was made using your best judgment and experience at that one snapshot in time. Upon receipt of the tool, pay attention to how it functions for the intended tasks to either confirm or contradict the forecast you made of the tool’s performance. Depending on the tool there may be some learning curve involved, so reserve final judgment until you have become well familiar with it. Consciously think of how the balance of features could be further improved for your purposes. This information will add to your experiences and observations, allowing you to make better and more accurate forecasts in future purchases.
A Primer on the Selection, Use, & Maintenance of the American Scythe
A Primer on the Selection, Use, & Maintenance
of the American Scythe
Last Updated March 31, 2024
The scythe is a powerful, versatile, and useful tool for the mowing and removal of unwanted grasses, weeds, and young woody growth. Quiet and pleasant to use, the scythe provides numerous advantages over mechanical mowers and string trimmers, and is able to be used in many locations where mechanical mowers can not. Unlike the chopped clippings of mechanical mowers, which can cause colic, the clippings generated by a scythe may be used as useful forage for horses, rabbits, and other livestock.
If you are reading this guide chances are you have just purchased, are about to purchase, or already own an American pattern scythe and are curious about how to get the most out of this versatile tool. In this document we will cover how to identify parts of the scythe, select the best model for your uses, adjust the scythe to your body, describe proper technique, and how to keep your scythe in good operating condition so that it provides you with years or even generations of faithful service.
~Terminology~
To best understand the descriptions that follow in further sections it is important to become familiar with the parts of the tool. The following diagrams illustrate conventionally accepted nomenclature for the scythe and its components.
Snath: The “handle” of the scythe. Can be used to refer only to the shaft or to the entire assembly complete with hardware.
Nibs: The side-handles of the snath. Distinct from “grips” in that they encircle the snath rather than being bolted or mortised into it.
Nib Iron: The threaded rod of the nib, onto which the recessed nut in the grip is tightened.
Nib Bands: The steel bands of the nibs.
Nib Blocks: The iron or aluminum ferrule through which the nib bands are drawn when tightened.
Hafting Collar: The collar at the end of the snath through which the loop bolt passes.
Heel Plate: A plate with a hole or series of holes to seat the end of the blade tang. Often integral to the hafting collar. Also sometimes called the web, though this can be confused with the web of the blade.
Swing Socket: An alternative form of heel plate that pivots for an increased range of hang adjustment.
Tang: The “tail” of the blade which is used for mounting it to the snath.
Knob: The bent end of the tang that seats in the mounting plate. Historically sometimes called the “claw”.
Shank: The portion of the tang in line with the blade.
Elbow: The bend, turn, or crook of the tang.
Heel: The base of the blade, including the tang.
Beard: The base of the blade as it projects, drops, or flares from the tang.
Toe: The tip of the blade.
Edge: The sharpened region spanning between the beard and the toe of the blade.
Spine: The back of the blade.
Chine: The raised lip of the spine.
Crest: A raised ridge on the backside of the blade that supports the toe after the termination of the rib. Not present on all blades.
Rib: The large stiffening channel that runs along the spine of the blade.
Bead: One or more smaller stiffening channels that runs alongside the rib. Not present on all blades.
Web: The span of thin steel between the rib and the edge. Conceptually akin to the web of a duck’s foot rather than a spider web.
Heel Set: The orientation angle of the tang with the blade. A square heel is the most common, presenting a 90 degree bend at the shank. A half set heel has a slightly more open angle and a full set an even more so. Half set and full set are alternatively referred to as half mulay and full mulay.
Web Set: The relative positioning of the height of the blade web vs. the height of the spine. Half set is most common followed by full set and quarter set.
Hang: The angle of the blade when mounted on the snath.
Lift: The “pitch” of the tang from the plane of the blade. Most American blades came historically without any lift to the tang with the end user adjusting it to their taste. Sometimes called the “cray” or “tack” of the blade.
(Inverted) Crown: A gradual upward bend or “smile” of the blade along its length. A blade with less crown will yield a more even stubble, but a blade with more crown will more readily follow undulating terrain and cut into dips and hollows. If a blade bends downward or “frowns” (an “obverse crown”) this is the result of damage, and should be corrected before use.
~Fitting the Scythe to the Body~
The first important step to ensure success with the American scythe is to test-fit the snath to your body. Modern snaths produced by Seymour Manufacturing are sized to the average modern person, but some vintage snaths will be on the small side for the taller American of today. Fortunately, the first step of tuning your scythe is very simple and can be performed in the store from which you intend to make your purchase.
Adjusting the Nibs: First, check the nibs to make sure they rotate freely. The nut at the top of the nib typically runs on a left-directional thread, so rather than turning counter-clockwise to loosen and clockwise to tighten, as with a conventional thread, the nibs are loosened by turning them clockwise and tightened by turning them counter-clockwise. This is important to keep in mind, as you wish to avoid over-tightening the nibs, making them difficult to remove. Once the nibs have been loosened you may adjust them to their proper position for your height. Stand relaxed with your feet shoulder width apart and the scythe standing upright on its end next to you (blade end on the ground.) While standing thus, bring the upper nib to a level that fits snugly under the arm and tighten it gently in place. The lower nib is then set one cubit down from the upper nib–a measurement equal to the distance between the elbow and outstretched fingertips.
For tall persons (roughly 6ft and above) you can expect most American snaths to be too short for this method to work, but such snaths may still be fit to taller users with reasonably good results. You will want there to be roughly 4″ of shaft above the upper nib to support the heel of your palm. Set the upper nib at this maximum position, and then set the lower nib one cubit down from the upper. The upward lay of the blade will be compensated for later in the fitting process by adjusting the lift of the tang.
Once the proper distance has been set the scythe needs to be balanced by rotating the nibs into proper orientation. Re-assume a relaxed stance, holding the scythe loosely by its nibs with the blade wholly to your right as if beginning a stroke, and the blade resting on its spine. The natural balance of the blade on its spine will commonly be ⅓ the length of the blade from the heel and you will want the spine of the blade to rest on the ground somewhere between here and the midpoint of the blade. Adjust the rotation of the lower nib to a position somewhere between 8-10 o’clock and place the left hand so that it is capping the butt of the snath. When the lower nib is in the proper rotational position, the snath may be lifted from the ground by the nib without tipping left nor right. This balance may not always be possible with very long blades, but even in extreme cases the nose-heavy balance can be minimized. Once the horizontal balance is tuned, adjust the orientation of the upper nib to where you are most comfortably able to lift the blade off the ground by pushing down on the upper nib with the heel of your palm against the snath and allowing the lower nib to roll in your right hand as a pivot. You will likely find that rotating the upper nib between the 9-11 o’clock position is the most comfortable and advantageous, allowing the elbow and wrist to sit relaxed and close to the body.
This initial adjustment is all simply to get you in the ballpark for your particular scythe configuration, and you will likely find yourself making further adjustments while using the scythe for extended periods. Listen to the tool and it will tell you how it wants to be used. Don’t be afraid to experiment with your adjustments!
Selecting a Blade: The blade you choose is the next most important thing for you to consider after snath selection, and they generally come in variations on the following styles:
Grass blades: The most common variety. Typically long, thin, and light. The “run” of the blade (the tilt of the blade relative to the ground) tends to be either parallel to the ground or only slightly lifted. A blade of this style in medium length (around 30″) will usually be capable of handling everything from fine lush grasses to (with practice and prudence) heavier woody plants like goldenrod, burdock, and thistles, but they are more prone to damage than other varieties due to their light build and long blades, which can compound the leverage of a bad cut and damage either the blade or the snath. They are, however, both the most commonly available blade style as well as the most versatile. Experienced users will typically use grass blades for the majority of their tasks. The heel of the blade should be wider than the thickest stalks being cut, so “Dutch” (wide) heels are preferred if the local vegetation includes thick-stemmed plants.

Weed Blades: These blades are similar to grass blades, but are usually used with a slightly upward lay and have a slightly broader, more robust build. These blades are well suited to handling the weedy overgrowth mixed with occasional woody plants that commonly occurs in neglected areas. The slight upward run of the blade helps reduce strain on the snath when running into unexpected woody plants, avoids cutting into small hillocks, and helps cut diagonally across the grain of resistant stalks at the expense of not leaving as low or level of a cut. Their shorter length assists with navigating the blade and reduces the tendency to snag, and the broad web easily cuts the full diameter of thick-stemmed weeds like burdock and thistle.
Bush blades: These blades are shorter and heavier, with a much broader blade, and are intended for clearing young woody growth ranging from goldenrod, burdock, and thistles up through very young green saplings. They are robust in the spine and are used with a steep upward run to allow the edge to cut with an upward shearing stroke along the grain of growth. These are generally best reserved for dedicated removal of woody material as they are more heavily built than a short grass blade.
Bramble blades: These blades are typically quite short and are used with the tang left flat. They are reserved for clearing woody-stemmed thickets and thorny bushes (such as raspberries.) They are not recommended for anyone not performing a similar task, as they are a purpose-built blade style that is not well-suited for general mowing duties. They are often narrow in the heel and with heavy curvature well suited to a backward stroke. The overall build is usually lighter than found on common bush blades, being somewhere between a grass blade and weed blade in thickness and width.
Trimming Blades: Ranging from about 12″ to 18″ in length and built like a grass blade, trimming blades are excellent for use in areas where a grass hook would otherwise be needed, such as confined spaces, and are good for trimming along foundations, cleaning up around stones or posts, the bases of trees, or other obstructions.
Hybrid tensioned blades: These are lightweight European-style blades manufactured with an American-style tapered tang, and are intended for use on American scythe snaths. The hybrid style is maintained like a conventional European blade but is curved in a way that is compatible with the American snath and strokes.
Mounting & Adjusting the Blade: Once a blade is selected, the attachment process will depend on the mounting hardware used by the snath but most, including all present Seymour models, make use of a loop bolt through which the tang is passed, and a series of holes for receiving the bent end (knob) of the tang. These are used for adjusting the hafting angle, or “hang”, of the blade, allowing you to make the angle more open or closed. A more closed angle is generally recommended as it minimizes strain on the blade and snath and cuts more aggressively though it narrows the swath of the cut. An open angle is used in fine grasses and clear ground, and is advantageous when clearing a large area as it maximizes the reach of the blade. This works best with blades that have a strong curve at the heel, as it does well to aggressively finish off any stray stalks that were not cut by the more gentle, stroke of an open-hung blade. The more open the hang, the greater the degree of pull that will be experienced through the cut–another reason why a closed hang is best in tough or dense growth.
The orientation of the tang with regards to the blade is known as the “set”, making the natural hang of the blade more open or closed. While most are “square set” one may find examples of “half set” or full-blown “open set” and these were intended for specially curved “mulay” and “Dutch-bend” snaths. Some loop bolts pass through the wood at the end of the snath and cannot be tightened beyond a certain point. In cases where clamping ability is insufficient to hold a thin-tanged blade, a heavy patch of oiled leather or rubber (a cut piece of vinyl hose works well) may be inserted between the loop bolt of the collar and the blade tang to provide a more secure fit and prevent wear on the parts.
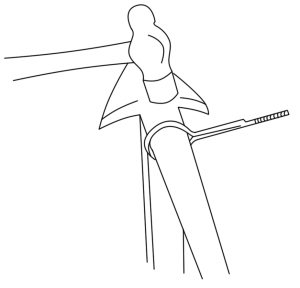
How the blade is angled in relation to the ground is known as the lay. The lay of the blade will depend on a few factors, including the height of the user, the curvature of the snath, and the angle of the tang. Of these factors, the angle of the tang (the “lift”) is the one most practical to adjust. This can be done by firmly locking the shank of the blade in a vise, heating the shank of the tang with a induction heater or oxy-acetylene torch, and using a bending fork to apply leverage. If a proper blacksmith’s style bending fork is unavailable, a rebar bending tool or large smooth-jaw automotive/monkey wrench may be used, or a suitably large and sturdy pipe slipped over the tang (though this does not control the bend as well as a wrench.) If this is done, a wet towel should be wrapped around the blade to prevent overheating of the edge, as this would damage its heat treatment. While at red heat the tang may then be bent to the proper angle for its intended snath, user, and task. Be sure to allow the heated region to slowly air cool–do not quench it with water, as this would make the tang brittle and likely to snap in use. Exercise extreme caution in the performance of this task, as both the torch and heated tang present potential fire and burn risks if performed without proper safety precautions. If the blade is improperly clamped or the tang insufficiently heated you run the risk of cracking the web when attempting the bend. The below diagram shows one of several ways to securely clamp the blade in a vise so that the web of the blade is not stressed during bending. If you have them, aluminum vise jaw pads can enable you to grip the blade by the rib up against the junction with the tang, which may provide the best leverage.
Clamping the Blade in a Vise for Adjusting the Tang
For a more in-depth explanation of how to bend the tang, including video of the process, see this detailed overview.
When a scythe is properly adjusted (including the lift of the tang) the edge of a grass blade should lay with about a finger’s thickness from the ground. As the proper lift of the tang is slightly less for weed blades, this measurement should be slightly greater on a blade intended for weed use or in rough ground. Bush blades require little or no pitch at all due to their upward pulling stroke. Bear in mind when adjusting your angle that wider blades will typically require a stronger bend to achieve the same edge elevation as a narrower one.
~Use of the Scythe~
The various strokes of the American scythe can be isolated into three regions of the body: the legs, the torso, and the arms. These three zones of the body are used varyingly in different circumstances according to specific mowing conditions. During mowing the lower nib acts as a pivot point while the left hand provides the drawing action of the stroke. This is the reason why the threads on nibs are reverse-directional. As the most resistance would be experienced as the cut is executed (rather than on the return stroke) it prevents the nibs from being inadvertently loosened. Many well-used snaths develop a high polish on their nibs from this pivoting action, and it makes them a pleasure to use. You may hasten the process with a fine sanding and light oiling of the wood.
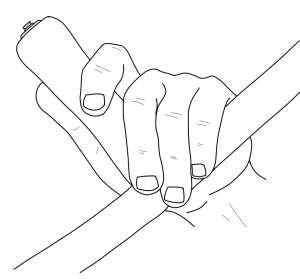
Grip: A common mistake many beginners make is thinking that the grips of the nibs are meant to be held in a simple “hammer fist” hold, which isn’t ergonomic and often leads to an overly tight grip. While such a grip may sometimes be used, at least one hand should generally be grasping the snath with the heel of the palm against the shaft, and the knuckles forming a diagonal line towards the grip, with the forefinger and thumb extended and the other fingers wrapped around, causing the hands to form a◿ and ◺ respectively, almost like holding the classic “10 and 2” positions on a steering wheel. The heel-braced spanning grip allows you to comfortably and stably hold the scythe to manipulate its movement in space, including shifting your grip by degrees to alter its presentation to the stroke. Experiment with your holds to find the combination that works best for you in any given circumstance!
A proper hold on an American scythe nib.
Core Technique: The motion of the arms is most easily described as being somewhat similar to the operation of the oar on a rowboat with the oarlock being the lower nib. The approach to the cut is “opened” as the right foot steps forward and the majority of one’s weight placed over it. The arms open towards the target with the left arm traveling furthest, and the point is brought to bear on the start of the swath, with the heel of the blade very slightly raised as the blade “toes in”. Upon the full opening of the swing and nearly all weight being brought to bear on the right foot, the weight of the body is shifted left in an almost falling motion as the the left foot is extended forward and the cut closed with a pulling motion primarily actuated by the left hand. As the cut is executed the heel finishes low, completing the slight lateral rock or “scoop” to the cut. This compensates for the presentation of the blade by maintaining the the edge at a fairly constant height relative to the target. The appearance of the technique in action resembles a faltering shuffle due to the forward/back shift of balance. The rib of the blade rides the ground during the entire length of the stroke, giving a uniform, low cut and relieving the body of the weight of the scythe.
The Motions of a Standard Stroke
A beginner may experience some mild muscle soreness initially due to the specialized muscle groups employed to use the scythe. This is to be expected and will quickly pass as those muscles grow accustomed to the task. Fatigue then becomes a minimal concern, as most of the work is done by the momentum generated by the shifting of balance and the pendulum action of scythe. When the motion of the body and the forces acting on the scythe are properly in balance the only force necessary beyond the natural action of gravity is the minimal effort required to keep the action in motion and to support the scythe itself. As the weight of the scythe rests on the ground during most strokes, the greatest energy expenditure usually stems from carrying the cut vegetation from the swath.
While the above provides a general overview of core technique, the mowing conditions and blade/snath configuration will call for adaptations of your technique for peak performance. The following examples illustrate how to adapt both the scythe and your technique to the mowing conditions at hand. While preferred nib settings are mentioned, they may be left in standard adjustment without negative effect.
Lawn Care: To best produce a close-cropped stubble closely resembling that of a mechanical mower, either a hybrid blade may be used or a grass blade with the tang strongly pitched to bring the lay of the blade parallel with the ground. A gentle downward pressure may be applied to the lower nib during the cut. Both the trunk of the body and the arms will provide the action, with the cut opening wide to about the 3 to 4 o’clock position and closing at the 9-8 o’clock position. Be mindful of how the toe of the blade enters the cut and keep the heel down. The tension created by the body and arms opening the cut will be released like a coil spring to close the cut, with the arm motion of the core technique being combined with a pronounced rotation of the torso. A fairly broad swath will be cut in this manner, and very close to the ground, but this method is best reserved for the smooth relatively unrestricted spaces and light thin grasses of lawns and will not fare well on bumpier ground or in tall growth.
Uneven Ground and/or Mixed Weedy Growth: The core technique will function well for much of the mowing, but resistant weedy patches or navigating depressions and hillocks can benefit from a short and shearing stroke with a lift at the end. Move the right hand across the body while rapidly drawing the left hand back and up. This will resemble a sharp sweeping motion, like flicking dust with a broom, and will provide a strong cut to a small and controlled space while either matching the slope of a hillock or interior of a depression, or cut diagonally across the grain of stemmy weeds. A grass blade or a weed blade may be employed depending on the mowing conditions of the site. A blade with a pronounced crown can be useful for getting into depressions.
The Motions of a Weed-Cutting Stroke
Dense Woody-Stemmed Growth: For dense patches of green woody growth employ a bush blade and set your nibs 1 to 3 inches closer together than your standard cubit measure. A “ripping” stroke up and back is used, almost like pulling the ripcord of a two-stroke engine or pulling a plant from the ground by its roots. This stroke is used to cut diagonally across the stems of the growth. Be sure to still close your cut properly in spite of the short length of the stroke–you want the edge to glide through your target rather than pull or chop through it. A very closed hang is recommended, and the bulk of the force from the stroke should be delivered with the heel of the blade. You will wish to avoid percussive force or overly thick targets as this can result in damage to the snath. A bush blade can make for very rapid and comfortable thicket clearing, but it makes a poor machete! If total eradication of these plants is desired you may follow up the clearing work by chopping the remaining root mass with a grub hoe or mattock. Since the freshly cut woody stems will be at a sharp angle, a second stroke at a lower presentation to pare the tops flat can be beneficial.
The Motions of a Bush-Cutting Stroke
These are just a few of the challenging mowing conditions that a user can potentially face, but by reading the land and “listening” to the tool you will quickly become proficient at adapting your technique.
~Sharpening & Maintenance~
In order to provide proper performance the blade must be kept as sharp and as thin in the edge as possible. The edge as it comes from the factory will require additional sharpening in order to be made ready to mow. While this was traditionally done using a relatively fine large-diameter water cooled grindstone, these are not commonly available to most individuals today. It is inadvisable to use a bench grinder for this work as the coarse wheels and high speed risk damaging or ruining the blade. A smooth-cut half round file or a coarse synthetic sharpening stone may be used instead. Belt sanders with sharpening-grade belts may be used for initial edge thinning if available, but extreme caution should be exercised as it is very easy to damage a blade if inexperienced. As a result power equipment should be avoided unless very familiar with its use. An excellent low-cost power grinding option is our specially formulated grinding points, which are designed to minimize heat buildup and can be chucked up in a common electric hand drill.
Sharpen the edge at an angle of about 7-9° per side. Examine the edge periodically by holding the blade edge-up under a bright light. Any spots where light is able to reflect off of the edge are dull and require additional sharpening. Once all such spots are removed the edge may then be refined by honing with a fine stone, ceramic rod, or other fine sharpening tool like a diamond or fine-cut conventional butcher’s steel. Our preferred style of sharpener is a canoe-shaped scythe stone, as it is capable of maintaining a lower angle than the American pattern scythe stone, and we recommend a combination of our Bull Thistle and Arctic Fox models to be used in tandem. However, a canoe-shaped stone requires a rolling action of the wrist to hold a consistent angle, and the faster speed and greater ease of holding a consistent angle makes the American pattern better suited to beginners, as well as being the most suitable shape for maintaining grass hooks, billhooks, bush hooks, and other miscellaneous forward-curving agricultural cutting tools that have tighter curves than scythe blades. When finished the edge should cleanly slice copy paper. Be sure to remove any burr that may develop, as this creates an artificial flattening of the edge that will prevent it from cutting properly. If a burr must be present it should be hooked upward rather than downward.
The edge may be finished by stropping with a wooden “whipping stick” to draw out any microscopic burr that remains, and may be used as the finest honing method in routine maintenance until the edge no longer responds as strongly as needed to the stick.
As a blade wears over time and becomes more narrow it may eventually become necessary to grind and sharpen the blade with the stone making contact against the underside of the rib and the top of the chine in order to maintain a sufficiently thin edge angle. This should be avoided as long as possible, however, to avoid excessive grinding causing the rib to be worn through. Most users will never use their blades to the point where contact grinding is required.
How a Blade Wears Through Grinding
Touch ups in the field are typically not required with great frequency unless the blade is run through dirt or strikes a stone, but if cutting performance noticeably decreases while mowing it is best to hone the edge with a whipping stick and a fine stone. When doing so one should stand the scythe on its small end and grasp the base of the blade firmly while making slow, and deliberate strokes on both sides of the blade. Work as slowly and carefully as necessary to produce a uniform and fine edge angle. When first starting off do not be tempted to mimic the rapid motions displayed by experienced scythe operators–until proficiency at a slow and deliberate pace is achieved speed will do nothing but produce a poor and rounded edge that takes many strokes to correct.
Keep all moving steel and iron components regularly oiled or waxed to prevent rusting and seizing. After use wipe the blade down with a dry rag to remove excess moisture. Any light to moderate rust may be easily and gently removed by the use of steel wool. Oiling the blade is usually not especially necessary so long as it isn’t put away wet. Any light surface rust will typically wear off in a mowing session due to the combined action of the weak acids of plant juices and the scrub brush-like effect of the cut stalks against the steel.
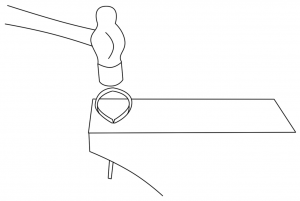
Adjusting the nib bands: Nibs may need their bands adjusted for a number of reasons, including shrinkage or crushing of the snath from age or use or a tall individual needing to move the nibs higher up on the tapered snath than their typically anticipated adjustment range. To do this, remove the nib from the snath and remove the wooden grip and aluminum block, leaving only the band and attached threaded rod. The best method for adjusting the shape of the band uses an anvil, although a vise and some ingenuity can get the job done well. Stand the loop on a flat anvil surface so that the shoulder of the loop’s teardrop shape is presented vertically (the threaded rod portion will likely be angled at about 45 degrees when this is done properly) and use controlled blows from a cross-pein or ball-pein hammer against the shoulder of the loop to draw the relaxed form of the band into a more closed position. Repeat on the opposite shoulder.
Tightening A Nib Band
If the loop is knocked “out of round” you may tap it back into true round form either by sliding it onto the long tapered horn of a stake anvil, or if one is not available to you, you may insert the threaded rod into the hardy hole or pritchel hole of a conventional anvil or into a length of narrow pipe so that a direct blow may be placed on the center of the loop to compress it without damaging the threads of the rod. Once the desired interior diameter is reached, test the fit by reassembling the nib on the snath in its desired new location, and perform any other adjustments as necessary to eliminate visible gaps between the band and the snath. There should be a slight opening to the top of the teardrop shape of the band so that it has room to cinch tighter when drawn into the mouth of the nib block.
Using the Pritchel Hole to True a Nib Band
Using the Horn of a Stake Anvil to True a Nib Band
Storage & Transport: When not using your scythe, proper storage will keep it out of the way and safe until needed again. The simplest method, if possible to do so, is to simply hook the blade over a wooden rafter close to the wall in a garage or barn. The wood of the rafter will not damage the edge and the unit hangs ready to grab when needed.
Hanging a Scythe from a Rafter
By placing the scythe near a wall accidental bumps or knocks are prevented. If a rafter is not available a long stout nail may be substituted and the scythe hung by the shank of the blade’s tang. The beard of the blade and the end of the snath serve to create a notch that securely straddles the nail. If neither is possible or practical it is recommended to dismount the blade from the snath to keep it out of harm’s way. The snath may then be stood upright along a wall, in a corner, or on a long-handled tool rack and the blade oiled and stored in a safe location. A simple blade cover may be easily fashioned using cardboard and packing tape, which will protect the blade against accidental bumps and prevent the keen edge from causing accidental injury.
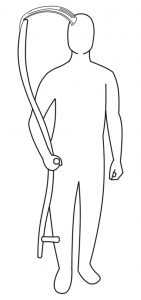
When taking a respite from active mowing, if possible, hang the scythe from a tree branch or stand the scythe on its small end against a stable object (such as a fencepost or sapling) so that the blade is uppermost and clearly visible. If no place is available where the scythe may be placed in this manner, keep it close to your person as possible with the edge in a safe and controllable position. A convenient and typically safe place to lay a scythe is with the blade tucked into the uncut grass where mowing was ceased, as others are unlikely to run into the unmown growth. When walking with the scythe it is preferred to carry it by the right hand nib with the snath nestled in the crook of the arm, blade end up, and with the toe of the blade facing directly forward. This provides visibility and control during foot travel to prevent accidental damage to the tool or injury to the self or others.
Safely Carrying A Scythe
If performing mowing service for others or attending scything events it may be necessary to travel with your scythe in a motor vehicle. In these instances it is recommended to dismount the blade from the snath and place it in a cardboard cover for safety. The snath may often then fit in the trunk of a car, but if not it may be easily transported in the cab of the vehicle. It is recommended to put together a small travel kit comprised of an adjustable wrench, oil, a dry clean rag, and a sharpening tool of your choice for edge restoration and maintenance.
There was never a sound beside the wood but one,
And that was my long scythe whispering to the ground.
What was it it whispered? I knew not well myself;
Perhaps it was something about the heat of the sun,
Something, perhaps, about the lack of sound—
And that was why it whispered and did not speak.
It was no dream of the gift of idle hours,
Or easy gold at the hand of fay or elf:
Anything more than the truth would have seemed too weak
To the earnest love that laid the swale in rows,
Not without feeble-pointed spikes of flowers
(Pale orchises), and scared a bright green snake.
The fact is the sweetest dream that labor knows.
My long scythe whispered and left the hay to make.
~Robert Frost

